Halloween Window at Magpie Kids
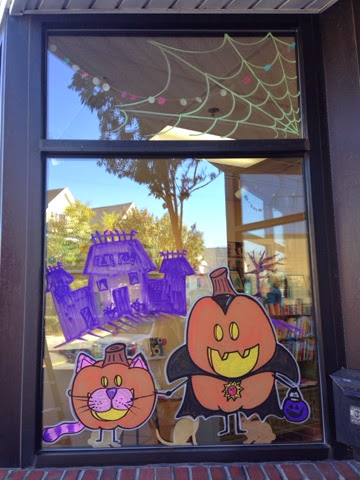
Halloween window painting at Magpie Kids in Somerville, MA.
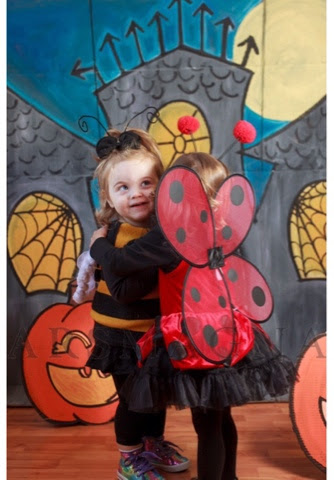
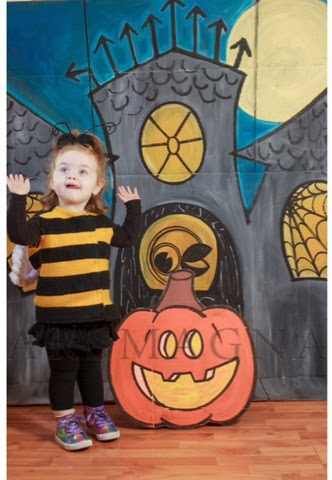
My little busy bee and her ladybug friend.
Photo cred: Allana of http://www.arsmagnastudio.com.
HAPPY HALLOWEEN!!!
Sadie the Incredible Mermaid Girl: D.I.Y. Traveling Side Show Mermaid Baby Costume
This year was my baby girl's first halloween as a dress-up-able-human and it was imperative that she have the perfect first Halloween costume. I had originally had my heart set on her being the bearded lady in a side show but when she wouldn't leave the beard on I decided to take advantage of the fact that she's not walking yet and put her in some sort of a sack costume which also meant that I would need to decorate her stroller...which naturally led me to make her the Incredible Mermaid Girl in a traveling side show!
I created her stroller cover using foam core as the fish tank frame; blue fabric, glitter tulle & clear plastic Christmas ornaments for the water; and foam core for the signage & held it all together using a glue gun. I attached the whole contraption to the stroller (a Britax B-agile) using Velcro Garland Tie and all that was missing was a fat little mermaid to go inside.
Enter one fat little mermaid.
I have a tutorial on how to make the shell top for the costume here
& the mermaid tail tutorial is in the works!
I'd love to see pictures of your home-made Halloween costumes. Happy Be-lated Halloween!!
Christmas here we come!!!!!!!!!!!!!!!!!!
Last Minute NO-SEW D.I.Y. Costume: Mini Hula Girl
Here's a last minute NO-SEW costume idea for you or your little one:
What you'll need
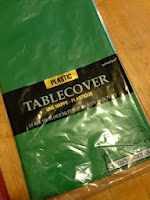
- a green plastic tablecloth
- scissors
- glue gun/glue sticks
- string/rope/twine
- fringe (optional)
- hawaiian flower for hair clip (optional)
- shirt or onesie
- felt for shells
- blue marker
1. Open your tablecloth and cut it down to fit lengthwise around your waist and so that it's long enough to just graze the knee.
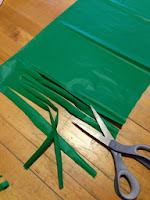
2. Keep it folded over and begin cutting it into fringe.
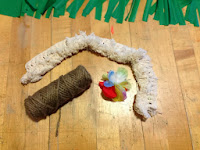
4. Hot glue your twine onto the skirt at the fold and let dry. Flip skirt over- hot glue the fringe to the front.
Your skirt is done.
Now for the shirt.
I'm using this off-white onesie for my daughter's costume. It has a design on it but it should be covered by the shells so don't worry about it. I'm also using left-over felt from her mermaid costume to be green and save a buck.
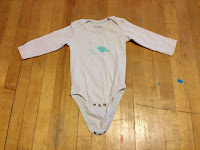

1. Lay the felt scraps over the design to figure out where the shells will go. Draw the shells directly onto the felt.
2. Cut out the shells and define them using any permanent marker. I like this blue but you can use any color.
3. Hot glue the shells onto the shirt.
Aaaaaand you're done!
Now slip the costume onto your little model and try desperately to get her to look at you.
Good luck and HAPPY HALLOWEEN!!!
Pickles are Spooky
Hay Girl! New Fall Window at River Dog!
Here is the new Fall window over at River Dog in Union Square- a furry little Scotty and his cat.

If this guy were a real dude I would be all over him! With his adorable emo hair swoop and fat feet...we'd be buddies. He's seen on the window keeping Dennis the sleeping shop cat company.
Dennis really has it made in the shade at River Dog and he's the reason there's some hay missing under the dog...that's his perch in there and he needs to be able to see out. It's important work he does over there.
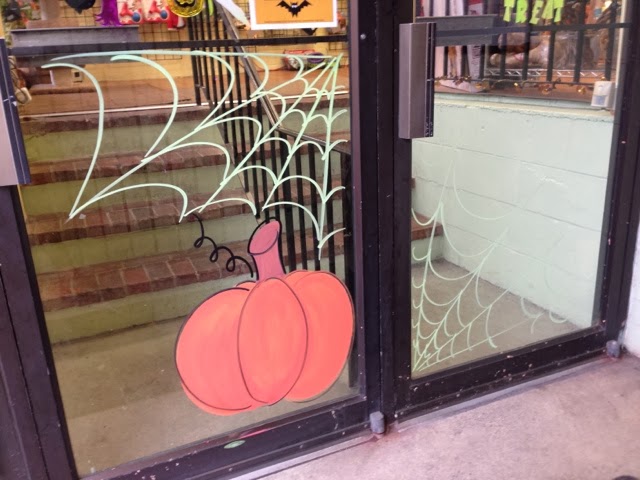
And because it's Halloween and I just couldn't resist...here's a pumpkin with some spiderwebs on the front door. Spooooooky!
Stop by River Dog on Oct. 20th to enter your dog in their costume contest!! More details on their facebook page. Good luck!!
Happy Halloween Mr. Oogie Boogie!
In honor of Halloween here is my favorite Halloween song of all time. Happy Halloween!!
Enjoy!
Tayla's Trick-or-Treat Pail
Skeletons in my Closet
$5 DIY Googley-eyed Fall Wreath Tutorial
I'm not sure what's happening to me but I felt an overwhelming urge to make an Autumn wreath this year. I've always been into decorating, and over-decorating, for the holidays but I usually keep it to giant fake spiders, severed hands and glittery skeletons. Your standard October stuff. So when I found myself shopping for a wreath making supplies, nobody was more surprised than me. It was as if I blacked out and woke up at the register with a wreath form and fake foliage in my hands.
So, I've accepted it, I like wreaths. There, I said it.
But that doesn't mean I have to make a button covered, gingham scarecrow country crafts with a giant bow type of wreath. I can like wreaths and still make them look like me. It doesn't mean I have to buy high waisted Mom jeans or run out and lease a mini-van. Not yet anyway.
So here is my tutorial on how to make a quick $5 Googley-Eyed Fall Wreath:
SUPPLIES (I got the $1 supplies from the dollar store)
$1 wreath form
$1 fall foliage x3
$1 5pk mini squashes
ball of twine (had on hand)
googley eyes (had on hand)
wire cutters (had 'em)
glue gun/glue sticks (had 'em)
To begin, start by tying the end of your twine to your wreath form and wrap the twine around the wreath for a space about 3" long. This is purely decorative.
Next, arrange your 3 bouquets of fall foliage and begin snipping them off of the main branch with your wire cutters. Arrange the new seperate pieces so that you have 2 equal bouquets (if you plan on making 2 wreaths...which I did because I have a double front door.)
Now begin adding the plastic foliage to your wreath just under the 3" band of twine. I used hot glue to keep the plants in place and then wrapped more twine around the base of each one- mostly because it looks cute but also to secure it in place.
When you reach the end add another 3" section of wrapped twine to finish it off. You can stop here and have a perfectly lovely Autumnal Wreath to hang on your front door but I feel like it's just too regular. It needs something.
In my case, that "something" almost always ends up being googley-eyes. Or "guurely eyes" as my niece calls them.
From the 5 pack of mini squashes I scooped at the dollar store, I grabbed a couple of 'em and gave them life. I am not unlike the good Dr. Frankenstein in this way.
Take your freshly googelied squashes and arrange them at the base of your fallin' foliage until you are satisfied and hot glue them into place.
**Note: my squashes are made of styrofoam which means they basically melt when the come in contact with hot glue. Turn your glue gun to the lowest setting if you have that option or put the glue on the wreath first and allow it to cool for about 3-4 seconds before placing your squash so that it doesn't turn into a puddle.**
And finally, add a twine hanger to the top of your wreath and hang with pride from your front door(s).
Together these wreaths cost me less than $10 and they can be left up through Halloween and all the way through to Thanksgiving. I hope you like them as much as I do. 

happy fall!
A little more bacon-y, please.
I feel like I've come to a good place in life when people know to come to me if they need something to look "more bacon-y". That was the request for this inexpensive bacon costume bought online by Karen- it just didn't look bacon-y enough so she asked me to fix it.
And it's a good thing because Maya and her pet sheep would have looked ridiculous in that store-bought bacon costume in the annual 4-H costume parade at the Marshfield Fair. That was a close one!
p.s. please note Maya's custom bacon bow...I think there's a Lady Gaga costume in her future.
Out of candy!!
HAPPY HALLOWEEN!
National Candy Corn Day of the Day!
I made this candy corn monster on my LiteBrite (leftover from my weddin') to celebrate today's holiday, which as I'm sure you're all aware, is National Candy Corn Day.
Personally I don't really like candy corn anymore but childhood me used to house them by the bag. I used to eat them white-to-yellow, eating the white and orange first and then saving 2 yellows to stick together and make one big yellow piece. Why I did that I'm not sure but it's a clear childhood memory that comes back to me every Halloween.
For more National Candy Day revelry here's a clip from Unwrapped about how Candy Corn is made:
And also, as long as we're here, a how-to video on making adorable candy corn nails!
Holler!
Mike Wazowski! Mike Wazowski! Mike Wazowski!
My entry for the pumpkin carving contest was a little gourd that just naturally looks like Mike Wazowski from Monsters Inc. All I had to do was carve out his eye and mouth, stick some arms on him (expired mouth swabs from work) and give him some horns (cardboard) to make him come to life.

Here he is next to real life Mike Wazowski. They could be cousins!
3 Days 'til Halloween!
Happy National Pumpkin Day!
Yesterday, motivated by my work's annual Pumpkin Carving contest and by the fact that today is National Pumpkin Day (no lie!) I turned this...
I've never attempted to sculpt a pumpkin, I generally just carve a 2-D face and call it a day but I was feeling particuarly ambitious, motivated by a mystery prize from work, and wanted to try my hand at sculpting my gourd this year.
...into this!
I went to my local art store at lunch and blindly bought these tools to use. What I found was that it's important for your tools to have a sharp edge to be able to slice through the pumpkin, the wire end sculpting tools and the wood carving knives were my best purchase while the wireloop sgrafitto, though it had the coolest name, was pretty useless in terms of pumkinery.
Next I drew a big scary mouth on the face of my "pumpkin" (which you may have noticed is actually an acron squash) and started carving. I used a carving knife to go along the entire outline of my drawing,
and then started gutting it out with the wire-end sculpting tools until each tooth was free. Then I took the skin off each tooth and shaped them so they'd be wicked scary, carved some squinty eyes and Viola!
My first 3-D punkin!
It was easier than I thought it would be, I think I'm hooked.
Stay tuned for the Pumpkin Carving Contest (this Friday the 28th) entry and results!
Happy National Pumpkin Day of America!!!
6 Days to Halloween!
We're almost there!!
Make Me: Faux Bois Planter
This weekend my friend Jennifer, a professional freelance gardner & general crafty-person, and I made this adorable Faux Bois (that's fancy talk for "fake wood") Planter. It was so so so easy and the finished product had us beaming with pride.

Here's how we did it:
First, gather your supplies.
You're going to need:
- an old plastic planter (ours had a big crack in it that we fixed with duct tape, trash to treasure!)
- some Fall plants
- potting soil
- white and brown acrylic paint
- a few old paint brushes: 4" brush, 2" brush and 2 detail brushes
- acrylic sealer
- black spray paint
- twigs gathered from the yard
- scrub brush
- Jennifer to make your flowers beautiful
Step 1: The first thing you'll want to do is give your pot a good scrubbin' using an old brush and some water.
Step 2: When the pot is dry, begin painting the entire surface with white acrylic paint (white house paint will also work) using your 4" brush. I used a heavy body acrylic in a horizontal motion to mimic the rings of bark on an aspen tree. This layer should leave some of the original pot color showing through for depth, it doesn't need to be solid white. This also does not need to be perfect- do however much or however little feels right to you.

Once you've painted the entire surface of the pot white, let the paint completely dry (mine took about an hour) before the next step: adding the details.
Then, with that barely there paint on your brush, begin lightly brushing rings on to your pot. Start with less and then keep adding them until you're happy. At this point, you'll probably think you're doing it wrong and it'll never look right- at least I did. Don't worry, it's really easy, it'll all come together in the end.
Right after you finish painting the brown, dip a 1" brush in water and begin blending the brown paint into the white with soft back-and-forth motions. The brown will soften and some of the color will mix making the base color less white.
Step 4: Once you're comfortable with your bark, add a few eyes to make the wood more realistic. I was nervous before starting the eyes but they were surprisingly simple. Using a small round brush i created the top of the eye, like you're drawing a small hill and filled it in lightly with brown paint. Then, using the same 1" decorative brush from before, I blended the paint and amd that's it- an eye!
The finishing detail is to add some darker lines with your small brush here and there around the pot to give it wear and make it seem more 3D, like the squiggles below.
Optional: I also chose to throw some brown paint inside the brim of the pot in case the flowers don't cover all of the terra cotta color.
Step 5: The final step for painting the pot is to seal the paint with an acrylic sealer so that your paint doesn't bubble up or detach from the pot after it rains. I used a matte finish sealer by Plaid.
Step 6: Now for the planting! Grab Jennifer from your supply list and let her at it. My friend Jennifer is a natural at container gardening and actually gets paid to make people's porches beautiful so I was lucky to have her come show me what to do with the minimal plants I bought for this project. 

The first thing she did was dump some rocks in the bottom of the planter for drainage. Then, when she was adding soil, we noticed the crack in the side of the planter was bigger than we thought, no problem. We duct taped the hole from the inside and were all set.
Next, start adding your plants. Jennifer told me that when you're transplanting something you should always tear the roots a little at the bottom to encourage rooting in their new environment.
She loosley arranged the plants on top of the soil to make sure she had the right placement and when she did we buried them in the soil and added more soil to the top. It looked fabulous...but Jennifer thought something was missing....
She gathered some twigs from the yard and asked if I had any black spray paint, luckily I had the butt-end of a can of black spray paint on hand and we sprayed the twigs she had gathered black and then put one of them in the planter...
...and Viola!!
NOW we're done! The black twig added the perfect creepy Halloween feel to my autumn planter!!

Happy Halloween!
Halloween How-To: Haunted Window
I love decorating for Halloween almost as much as I love Halloween candy. Every year I'm tempted to make the front of my house look like a creepy haunted house with different scary scenes in every window and a scarecrow on the porch and every year I have to remember that the only person those decorations would scare...would be me. I can imagine putting a sillouette on my front window, forgetting I did it and then running for my life, every night when I get home. I'm sure the thought of that would have my Sister, and chief childhood tormentor, rolling on the floor laughing her face off.
So this year, I decided to make this awesome INDOOR haunted window and you can too!!
To make, you'll need:
- an old window frame
- a string of spooky Halloween lights
- a plastic window cover w/Halloween image
- hot glue gun
- scissors
- duct tape
Step 1: Gather your supplies-
I'm using this old window frame we salvaged (aka took from the neighbor's trash) a couple years ago as the base of my project-
And this plastic window cover left over from last year's Halloween party (cut in half)-
Step 2: Applying plastic sheeting-
Place your window frame and plastic face down on your work surface-
Heat up your glue gun and place a small line of glue along the inside ledge of the window-
Line your plastic up with the top of the window and press into place either with your fingers or with a tool, the eraser end of a pencil perhaps-
Repeat on all sides.
***CAREFUL!! GLUE IS HOT!!!***
At this point you may have some extra plastic hangin' over the side, you can either- a) fold it and glue it down like you're wrapping a present or b) just cut it off:
When you turn your project right side up, you should have something that looks like this:
If that is the case, please move on to Step 3. If not, please return to Step 2.
Step 3: LIGHTS!-
I'm using a string of purple and orange lights that flicker and mimic fire when lit up, so spooky, if you don't have any you can buy them here or here.
LED lights are a good idea to make sure you don't melt the plastic sheeting and then hate me forever for ruining Halloween.
At this point, having a black cat to check your lights (aka tangle them up) is not necessary but it will add authenticity to your project- mine is probably at her food dish if you'd like to borrow her:
Once again, turn your window face down on your work surface and tape your lights onto the back in whatever pattern works for you, making sure the plug is left out on the bottom.
I chose an octagon because it was the only way the lights fit properly:
Step 4: Hang it up!
Now the only thing left to do is fill a bowl with eyeballs and dig out your favorite severed hand to create a super spooooooky indoor haunted window display that won't make you run for your life!
Happy Halloween!
~mandee rae
